1. Master and Sub-Accounts
Master and sub accounts video: https://youtu.be/PzxNG9kMnAY
In DataTill, we’ve upgraded our features to include master and sub-accounts. This is especially helpful for businesses with various branches that are connected to a main profile.
Billing Configuration
Choose between central or individual billing for sub-accounts.
• Main Account Billing: Each sub-account gets its own invoice, managed centrally.
• Independent Sub-Account Billing: Each sub-account handles its own billing and receives a separate invoice.
This feature gives you flexible control over how billing is managed across business segments in DataTill.
2. Master Accounts
To be able to mark an account as a master account, you need to go to the customer’s profile. Look for the “Account Details” section and then click on the “Edit” button.
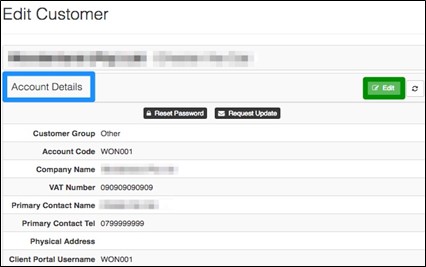
On the following screen, navigate to the “Master” tab. On this screen you will need to complete the following settings:

| Red: | To mark the customer as a “Master Account” switch the toggle button to yes. |
| Pink: | If the master account should be billed for all the sub-accounts, switch the toggle button to Yes. This means that the master account will receive an invoice for each sub-account linked to it. If each sub-account is responsible for their own account, leave the toggle button on No. |
Click on the “Save” button found at the bottom of the screen to mark the customer as a master account. After the customer profile has been marked as a master account, an orange banner will appear on top of the customer profile to inform you that “This is a Master Account”.

3. Sub-Accounts
To link a sub-account to a master account, you will need to go to the master account profile. From there, go to the “Account Details” section and then click on the “Edit” button.

On the following screen, navigate to the “Sub Accounts” tab. On this screen you will need to complete the following settings

Click on the “Add” button to link a sub-account to the master account. On the pop-up screen, look for the relevant customer in the drop-down menu and then click on the “Add” button.
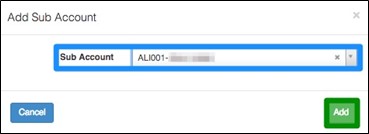
After you have added a sub-account, you will see the following screen:

View all sub-accounts connected to the master profile, along with their contact details. To access a sub-account’s customer profile, click the black button on the far right.
To remove a sub-account from a master account, click on the red x. Remember to click on “Save Changes” after adding or removing sub-accounts from the master account.
After marking a profile as a sub-account, the sub-account will have a banner on top of the profile to mention that “This is a Sub-Account of (master account name)”.

4. Billing
Decide how billing should work with the master and sub-accounts feature. You can either group all billing under the master account or manage billing separately for each sub-account. This setting is configured when marking the profile as a master account (see Section 2).
4.1. Bill all to Master Account:
When bill all to master account is enabled, all invoices from sub-accounts will be made out to the master account. Your invoices for will look similar to the screenshot below:
In the pink section, you’ll find the master profile’s account code and the Origin Ref, which is the sub-account’s code used to generate the invoice. When the “Bill All to Master Account” option is active, invoices from sub-accounts are issued to the master account. Details for the master account appear in the orange section.
4.2. Bill each Sub-Account individually:
When bill all to master account is disabled, all sub-account invoices will be made out to the sub-account instead of the master account. Your invoices for will look similar to the screenshot below:

The invoice resembles a standard monthly ISP invoice. In the blue section, it’s addressed to the sub-account rather than the master account. Since there’s no Origin Ref, it confirms the invoice was generated directly for the sub-account, as noted in Section 4.1.
4.3. Suspending Customers for Non-Payment:
Before suspending master or sub-accounts, ensure there is a clear understanding of non-payment, overdue balances, and suspension terms. The new suspension module allows you to suspend individual sub-accounts or bulk suspend the master account along with all linked sub-accounts.
For detailed guidance on using the new suspension module—including individual and bulk suspensions—refer to the Suspension Manual.