Fleet management video: https://youtu.be/Nk3YSNmjO0Q
Fleet Management

Fleet Guide:
Fleet management involves organizing and overseeing a business’s vehicles or assets to improve usage, efficiency, and safety while reducing operational costs. The fleet module, tailored for ISP businesses, supports these activities and provides timely updates on license renewals and vehicle servicing schedules.
1. Permissions:
In order to be able to access and use the fleet module you need to navigate to Setup > Admin Users.
Search for the user that needs to responsible for the management of fleet and click on edit user.

Under the User Permissions tab, scroll to Fleet Management. Based on the user’s authority, choose whether they can edit or only view fleet data

Fleet management:
Setup:
2. Business Unit:
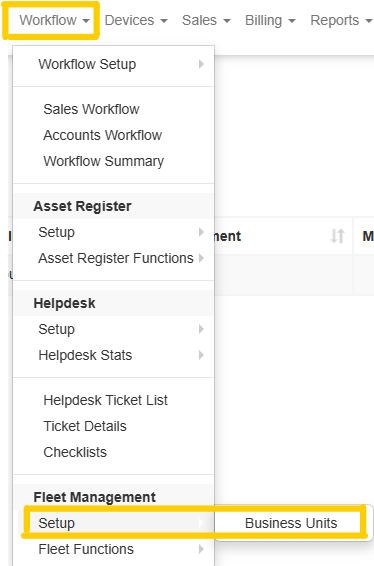
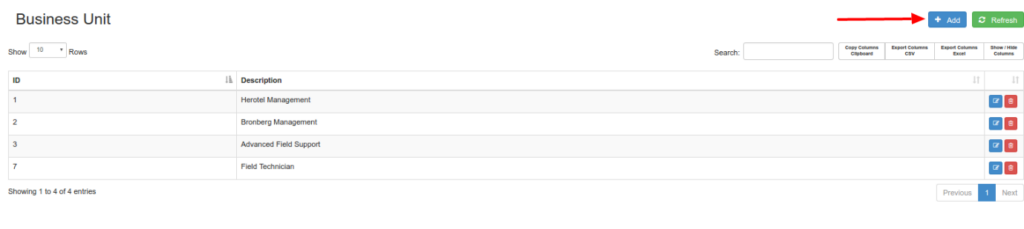
To add a business unit, navigate to Workflow > Fleet Management > Setup > Business Units. Then Click on add.
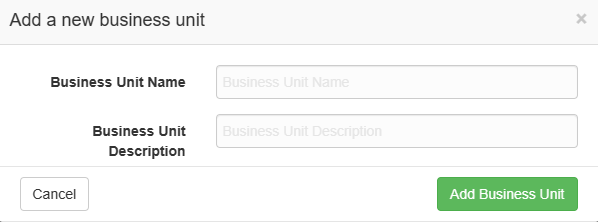
Enter the name of the business unit and a description. click Add Business Unit.
Fleet Functions:

3. Cell Phone Packages:
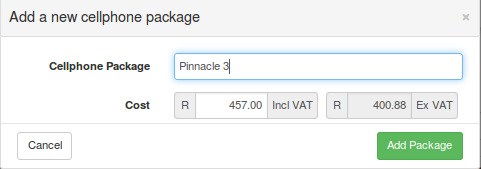
If your company issues cell phone packages to drivers, you can manage them via DataTill. First, load the packages under Workflow → Fleet Functions → Cell phone Packages. Then click +Add, enter the package description and cost, and select Add Package to save.
4. Vehicles
4.1. Add Vehicle:
In order to add a vehicle to the system, navigate to Workflow > Fleet Functions > Vehicles. Press on the +Add button to add a vehicle.

On the Vehicle tab fill in the vehicle registration (has to be unique in the system), make, model, service interval e.g.,15000 km, VIN number (has to be unique), year and the odometer reading.

On the Tracker and Insurance tab, enter the Tracker Premium (if applicable), Insurance Company, Insurance Premium, Ownership Type (Leased, Private, Owned), Vehicle State (Operational, In for Repair, Non-Operational), and the Location (as added in step 4.1).

If you would like to upload the photo of the vehicle license disk, on the Vehicle License Disk tab, you can upload a photograph of the vehicle license here’s an example below.
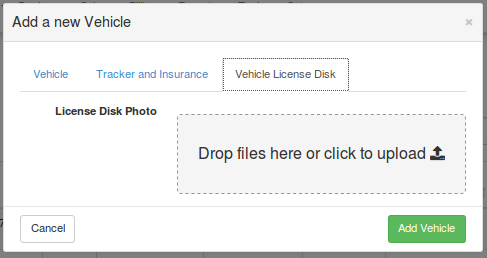

After all the information has been filled, click on Add Vehicle.
4.2. Update Mileage:
In order update the mileage of a vehicle click on edit vehicle button 

Enter the updated odometer reading and click on save changes.

4.3. Renew License:
In order to renew a vehicle’s license, navigate Workflow > Fleet Management > Fleet Functions > Vehicles and select the vehicle you would like to renew a license for by clicking on  “Renew License.”
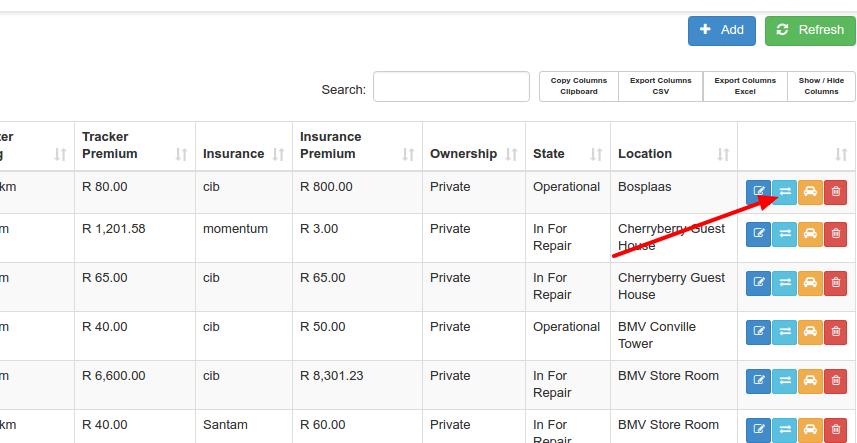
Specify the date the renewal has taken place (renewal date), specify the date that the license expires (expiry date) and the cost of renewal (renewal fee).
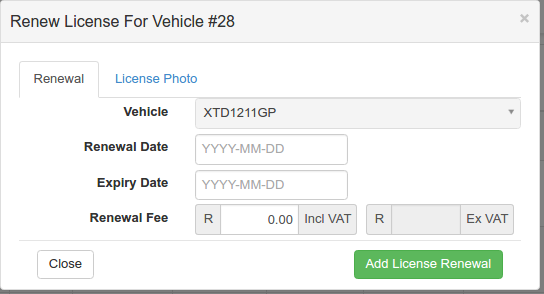
If you would like to upload the photo of the vehicle license, click on license photo, upload the license photo, and click on add license renewal.

To view the license photo, click on edit vehicle and navigate to the license photo tab and the photo will be there.
4.4. Book Service:
In order to book a vehicle for a service navigate to Workflow > Fleet Management > Fleet Functions > Vehicles and select the vehicle you would like to renew a license for by clicking on “Book Service.”

Specify the date of service, the mechanic or panel beater that serviced the vehicle as well as the odometer reading at service and click on add service 

Once a service has been added, click on show hide columns, then click on Km’s till next service to be able to view the kilometers.

4.5. Notifications:
E-mails notifications are sent when a vehicle is less than 1000 km from a service and when a vehicle is less than 60 days from license expiry.
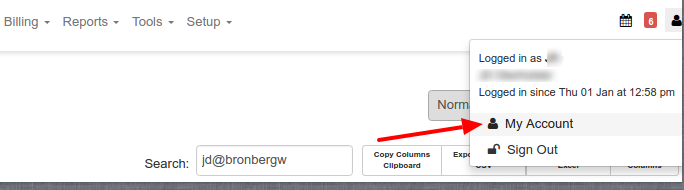
To enable email notifications, go to My Account by clicking your profile icon (top right corner of the menu). From there, select which notifications you’d like to receive.

To be able to receive Fleet License Renewal and Fleet Service Due emails you need to turn on the settings on my account page and click update.
5. Drivers:
In order to add a driver, the driver must first be an admin user on DataTill (no permissions required for the driver).
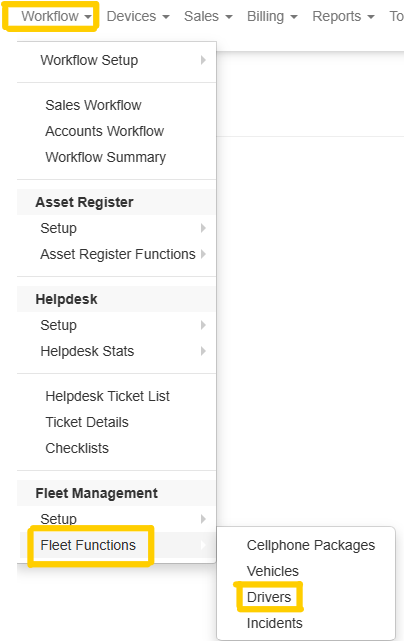
To add a driver, you first need to navigate to Workflow > Fleet Management > Fleet Functions > Drivers and click on Add.
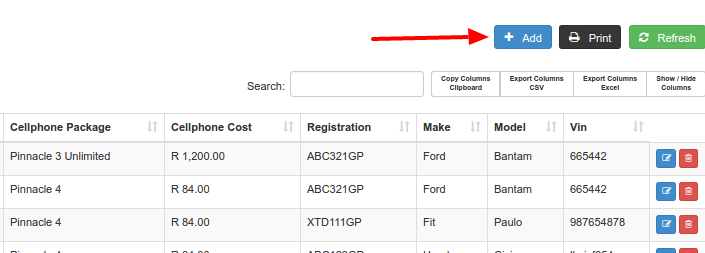
On the Driver Information tab, select the driver’s name (must be an admin user), license code, the associated business unit, allocated cell phone package, and the vehicle assigned to the driver.

It is possible for a driver to be able to drive multiple vehicles. In order allocate another vehicle to a driver click on add vehicle and select the vehicle to be allocated to the driver.

It is possible to add a driver’s license photo by clicking on the license photo tab.
On the Vehicle License Disk tab, you can upload a photograph of the vehicle license.

Once all the information has been supplied you can click on Add Driver.
6. Incidents:
In order to add an Incident, the user needs the “Fleet Write” permissions.
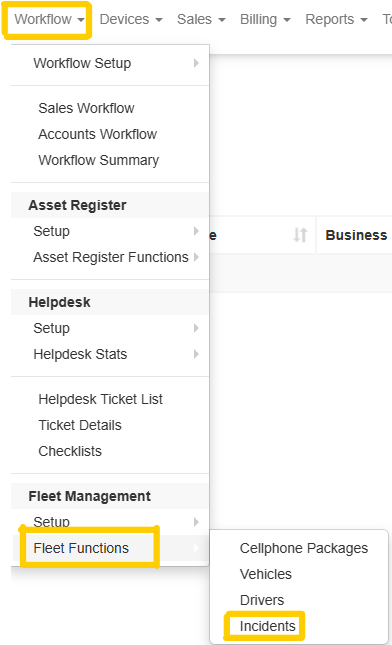
To add a driver, you first need to navigate to Workflow > Fleet Management > Fleet Functions > Incidents and click on +Add Incident.

Add all relevant information. Use “Driver Responsible” to select a driver from the Fleet Driver list, and “Driver Authorized” to indicate whether the driver had permission to operate the vehicle. In the tab below, complete details such as Incident Type, Incident Date, Vehicle Registration, Vehicle Driver, and other necessary fields.

On the following tab you will find Insurance, here you will fill in all your insurance claim details like Insurer, Incident claim number, Insurer contact person etc.

On the following tab you will find Third party, here you will fill in the Third-party details of the person who was involved in the incident.

On the following tab you will find Photos, here you can add images of the incident, just drag, and drop the image and click to upload.

On the following tab you will find Documents, here you can upload all of the needed documents of the incident, you can drag and drop each document in their correct section and click to upload.
